AWX-23.9 使用 SAML 对接 Keycloak-24 认证
文档时效性说明
本文档基于写作时的技术栈编写,下方的版本号、API 参数、镜像 tag、第三方项目活跃度可能已过时。请以官方最新文档为准。
已知过时点:
- AWX 23.9(当前最新 24.6.1)
- Keycloak 24(当前最新 26.6.4)
- Keycloak 25+ 默认 saml-security-profile 收紧,"关闭 Client signature required" 违反新策略
1. 生成 SSL 证书
在任意 Linux 执行以下命令生成 SSL 证书:
Tip
此 SSL 证书直接申请了 10 年有效期,记得在 10 年后更新。
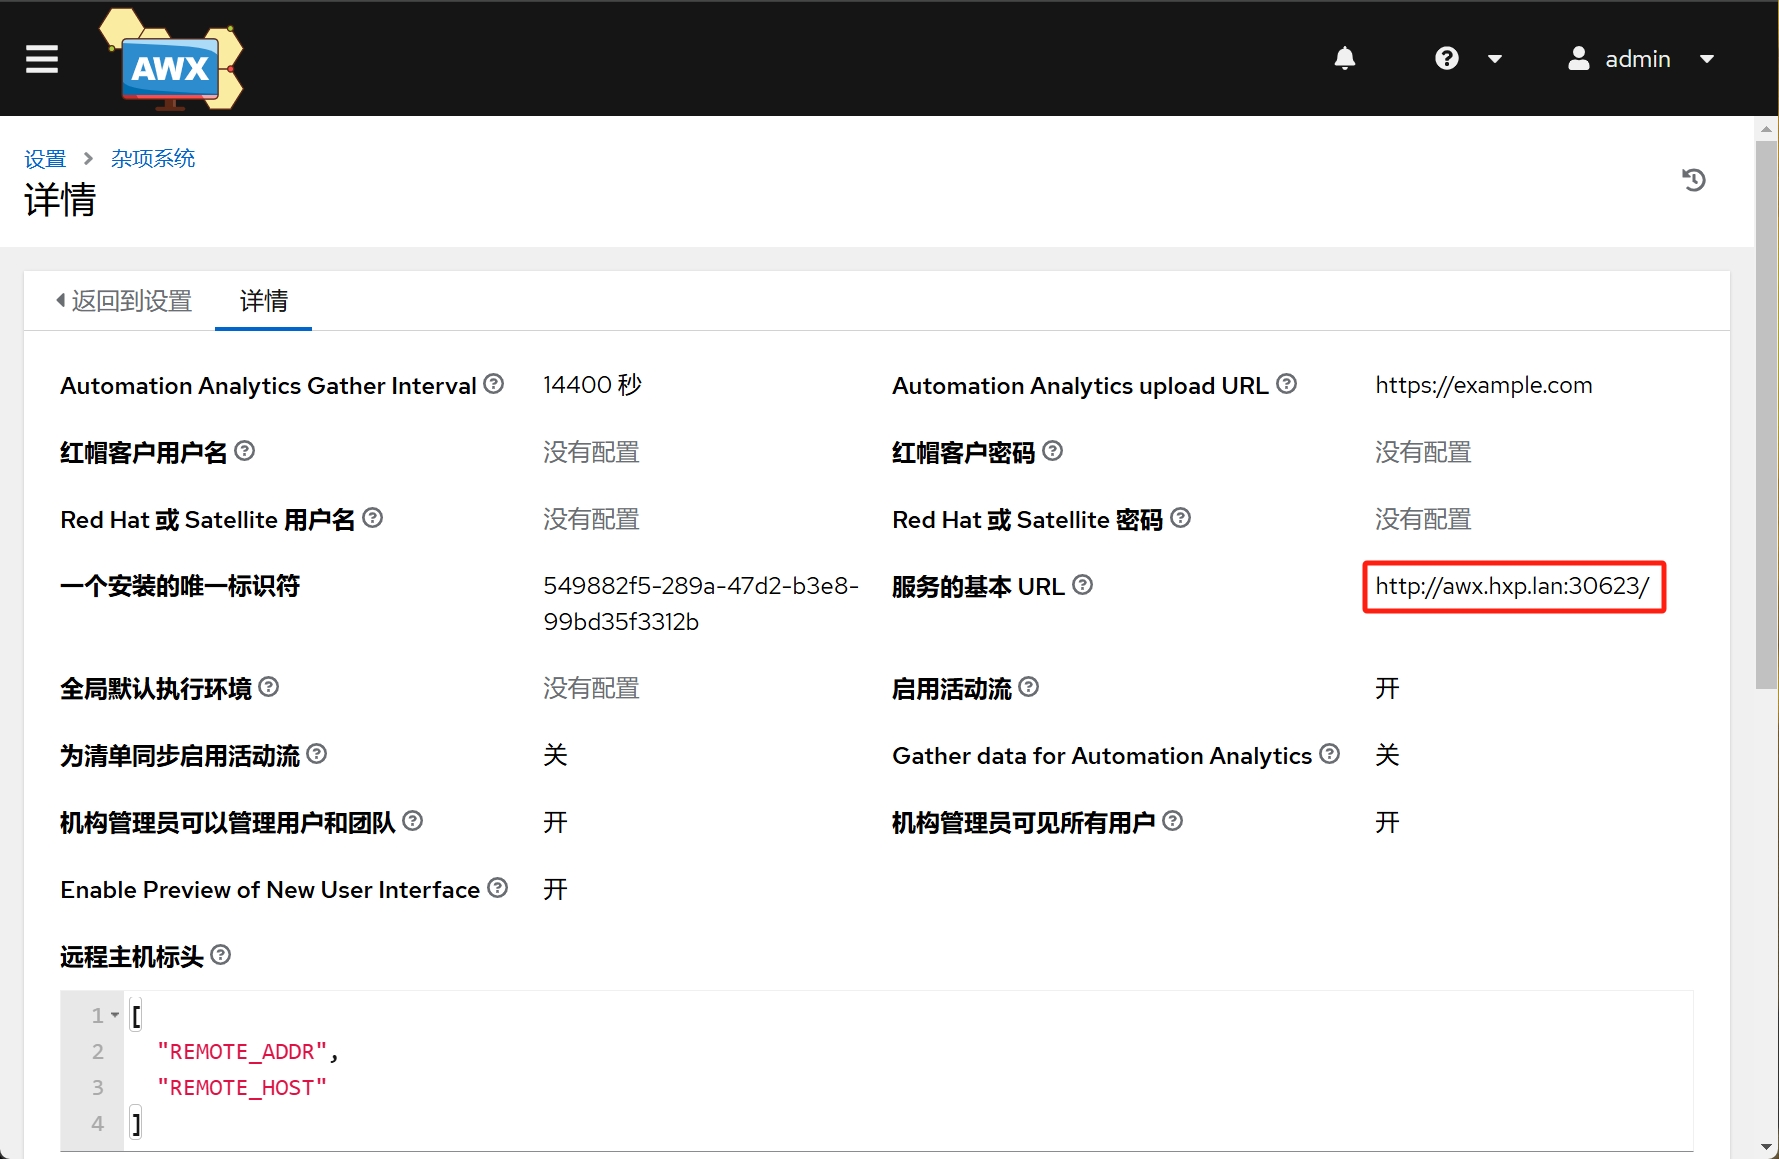
2. 修改 AWX 配置
点击 设置 -> 杂项系统 ,修改 服务的基本 URL 为 AWX 的公网 URL:
3. 在 AWX 上配置 SAML 认证
点击 设置 -> SAML ,填写 Keycloak SAML 服务器配置:
3.1 SAML 服务提供商实体 ID
填写 awx-saml
3.2 SAML 服务提供商公共证书
上传生成的证书 certificate.pem
3.3 SAML 服务提供商私钥
上传生成的密钥 key.pem
3.4 SAML 服务提供商机构信息
填写以下内容:
3.5 SAML 服务提供商技术联系人
填写以下内容:
3.6 SAML 服务提供商支持联系人
填写以下内容:
3.7 SAML 启用的身份提供商
填写以下内容:
x509cert 内容这样生成:
3.8 SAML 机构映射
3.9 SAML 机构属性映射
默认值
3.10 SAML 团队映射
默认值
3.11 SAML 团队属性映射
默认值
3.12 SAML User Flags Attribute Mapping
默认值
3.13 SAML 安全配置
默认值
3.14 SAML 服务提供商额外配置数据
默认值
3.15 SAML IDP 到 extra_data 属性映射
默认值
4. 获取 SAML 配置并导入 Keycloak
在 AWX 上完成 SAML 配置后,配置页面上 SAML 服务提供商元数据 URL 可下载 SAML 配置,下载此配置后,在 Keycloak 上新建 Realm 名称 awx ,点击 Clients -> Import client 将此配置导入:
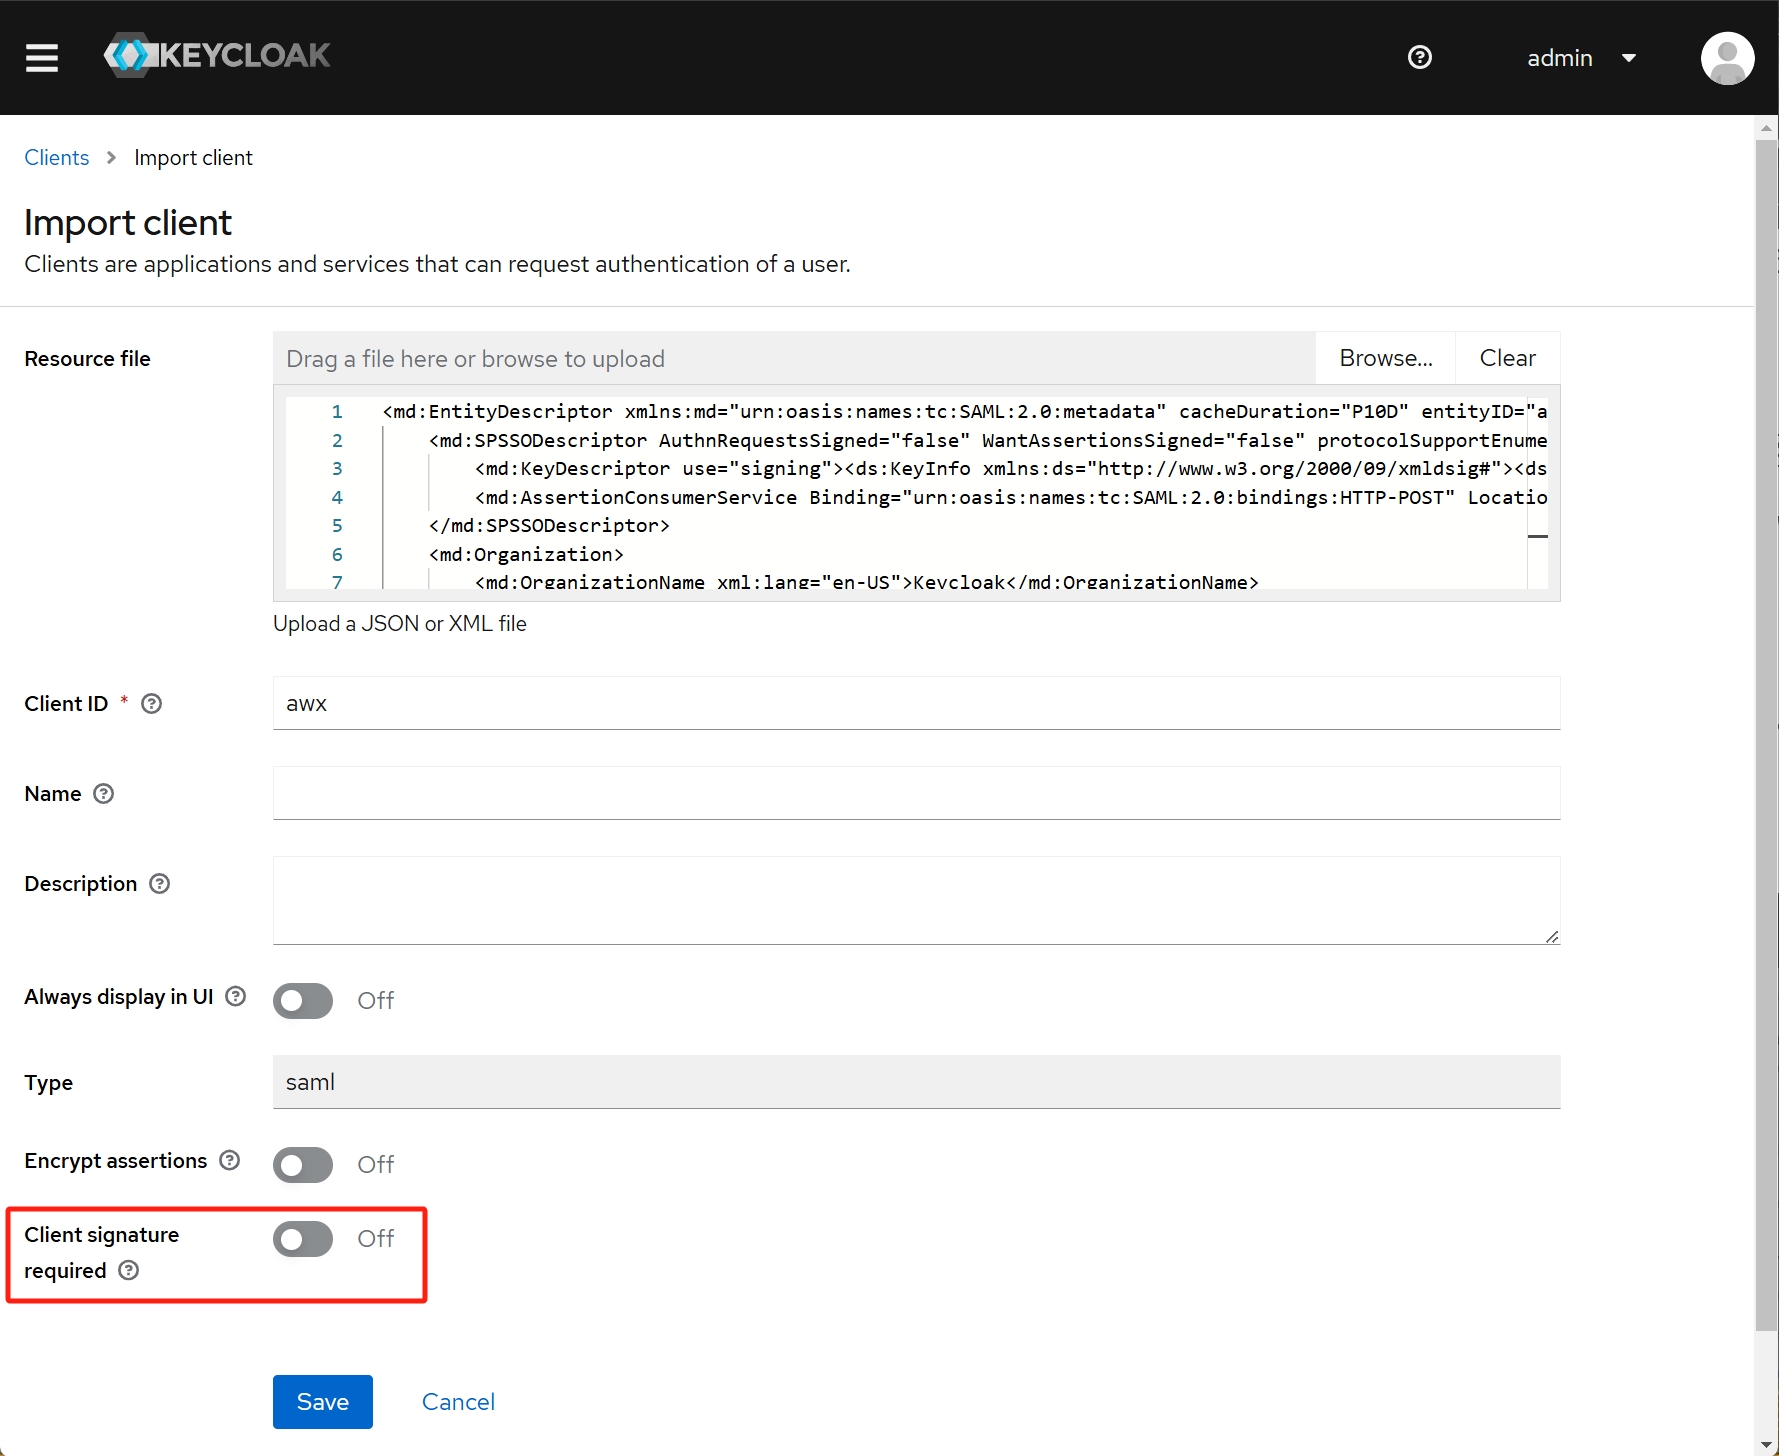
导入配置时需要将 Client signature required 关闭。
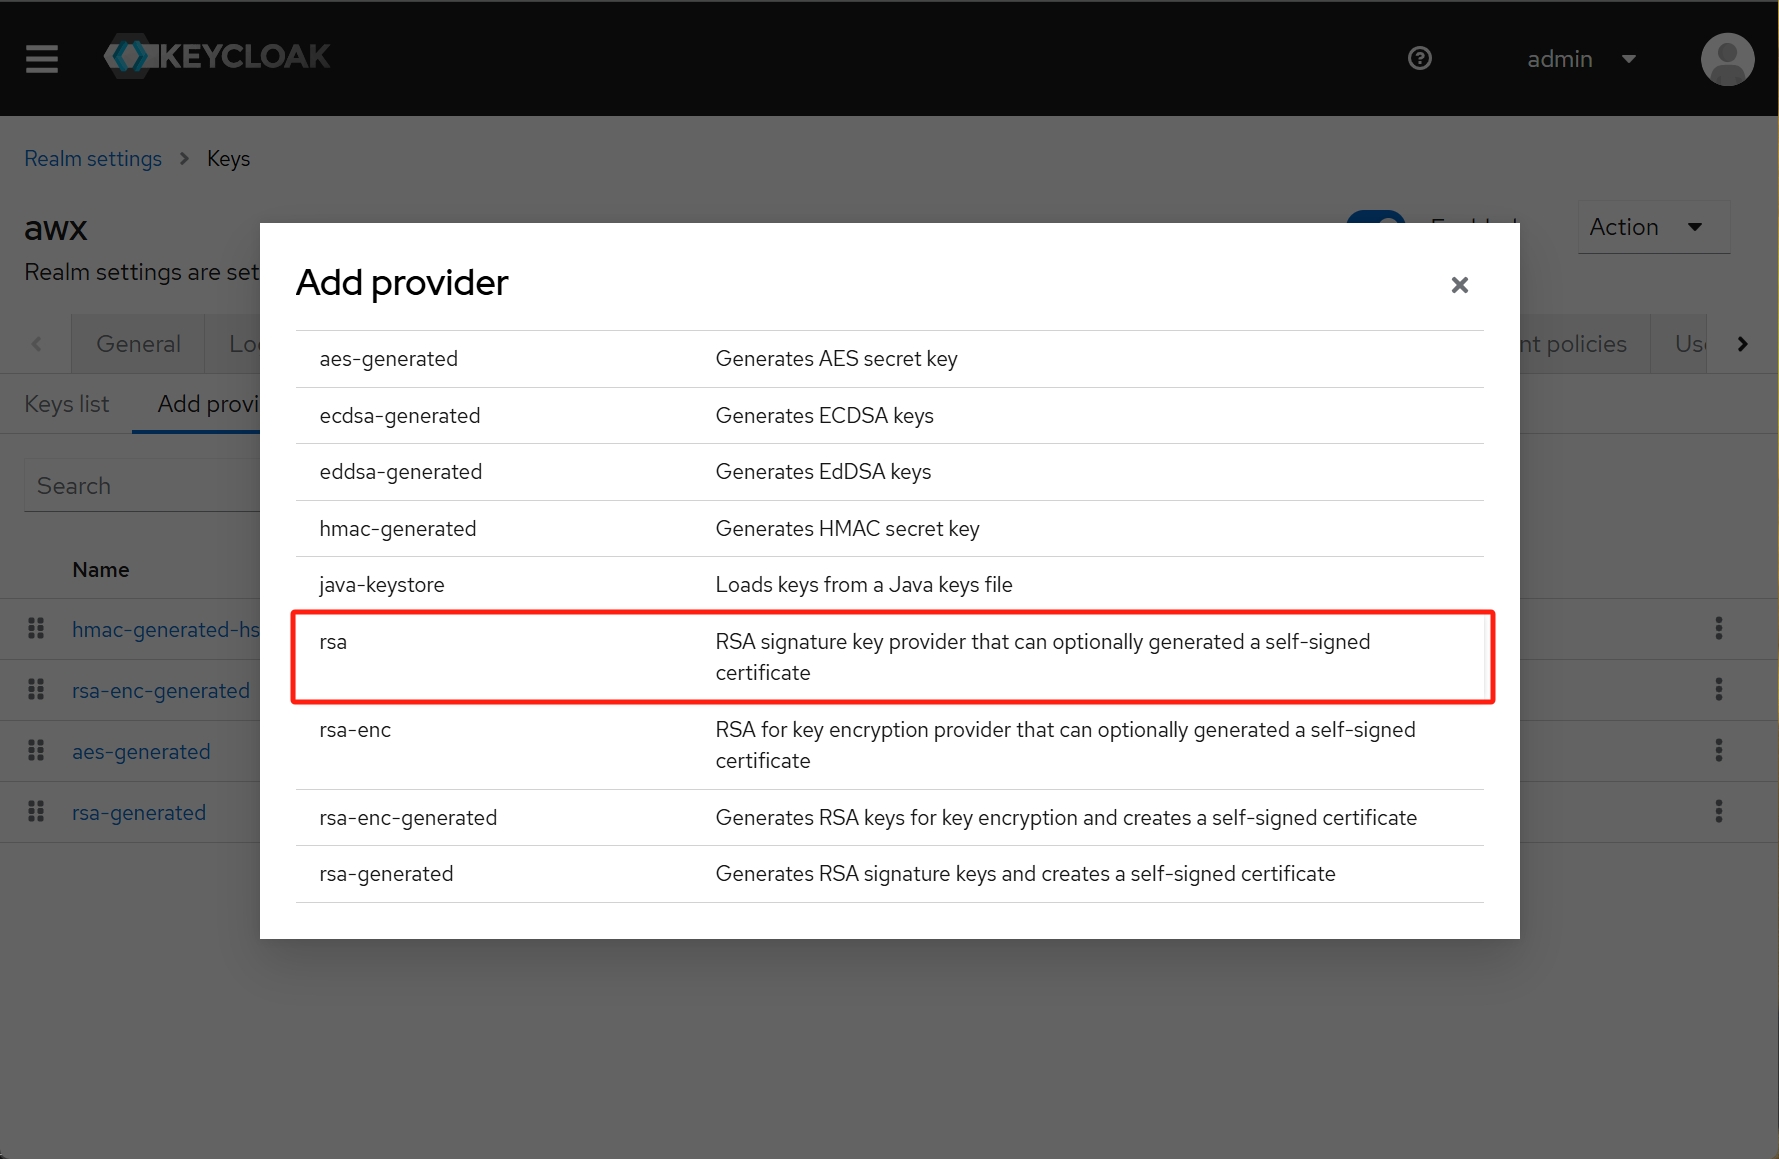
5. Keycloak 导入证书
自签的 SSL 证书需要导入到 Keycloak ,点击 Realm Settings -> Keys -> Add provider 添加类型为 rsa 的密钥:
选择证书和密钥并保存:
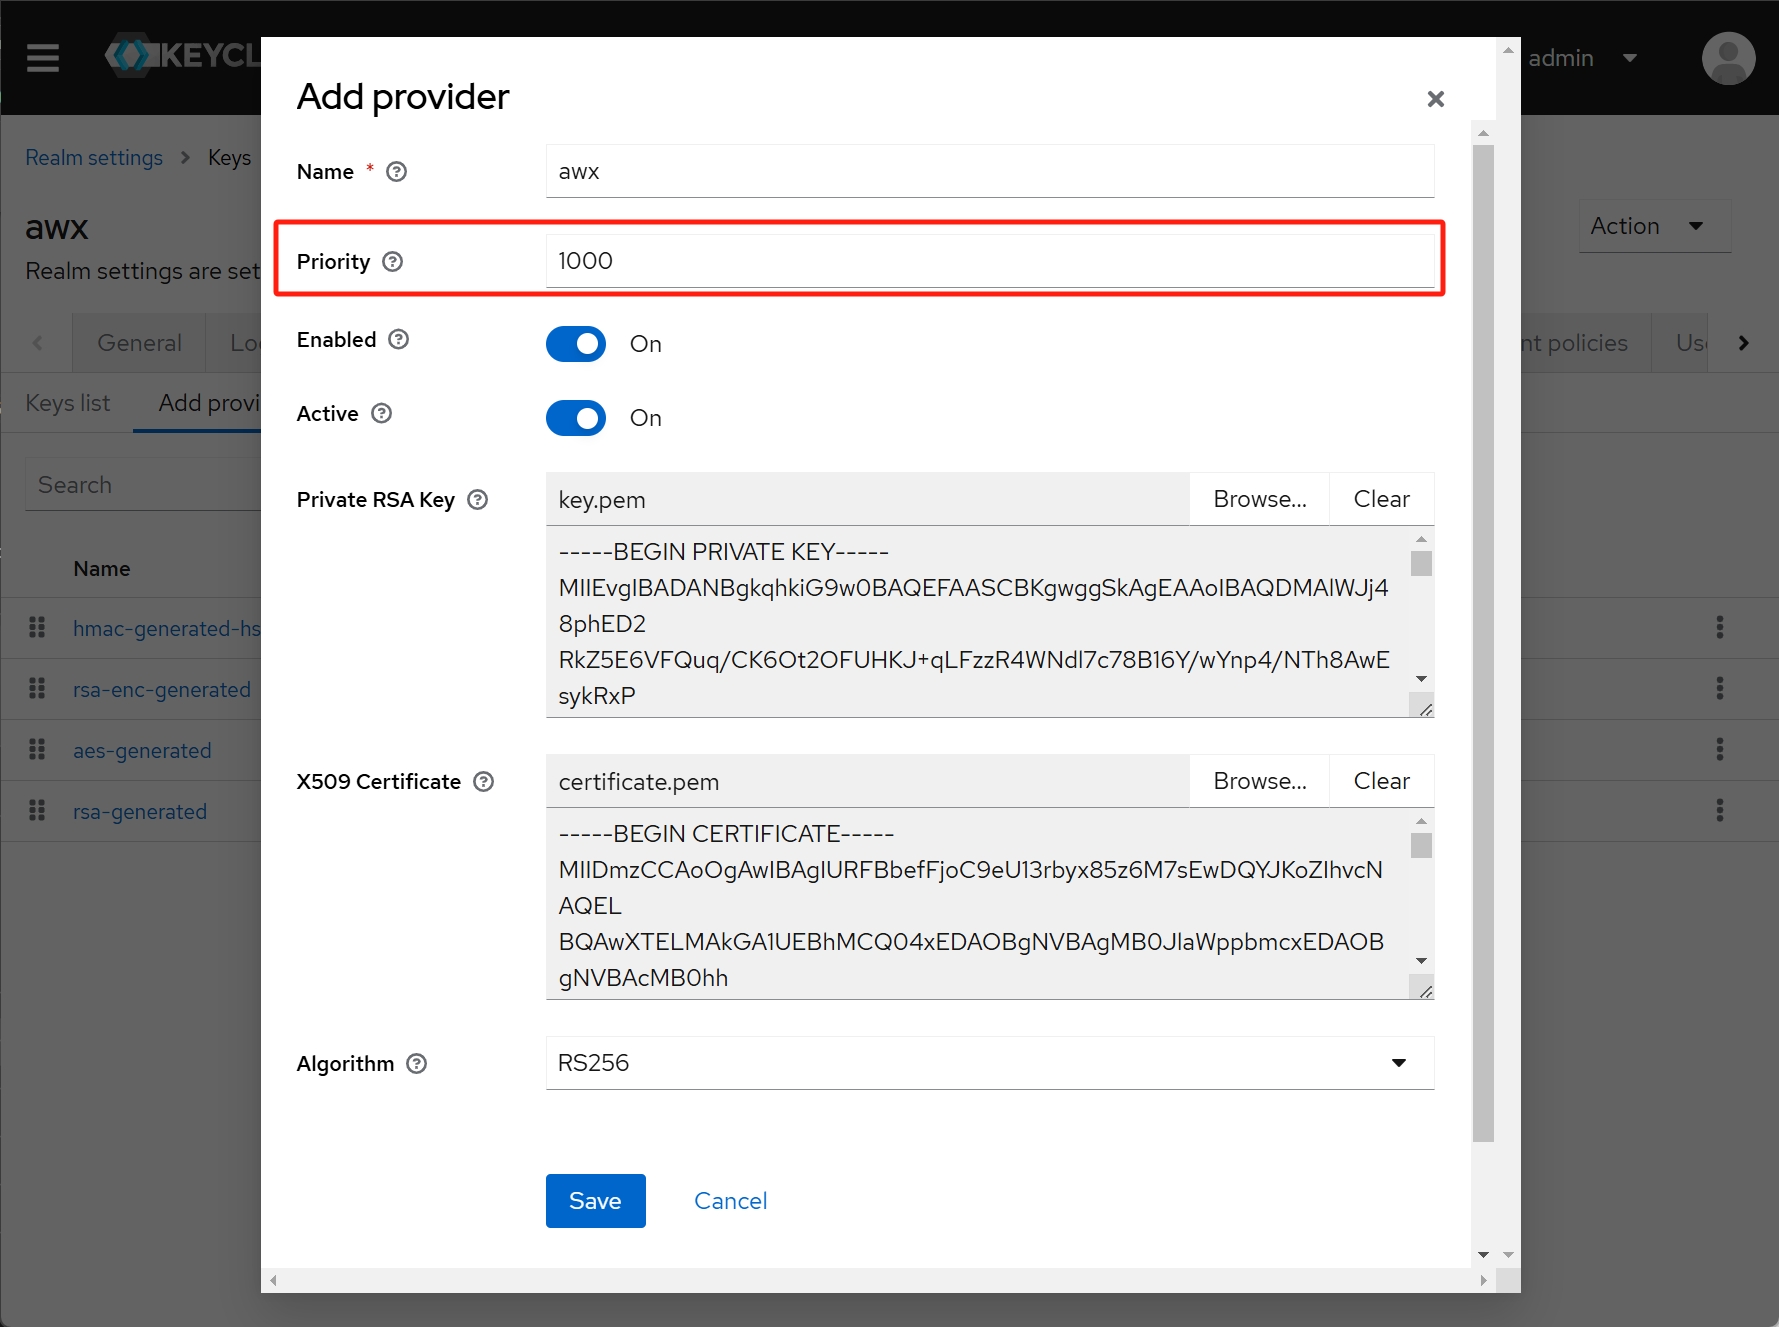
注意这里的优先级必须足够大。
6. Keycloak 配置用户信息映射
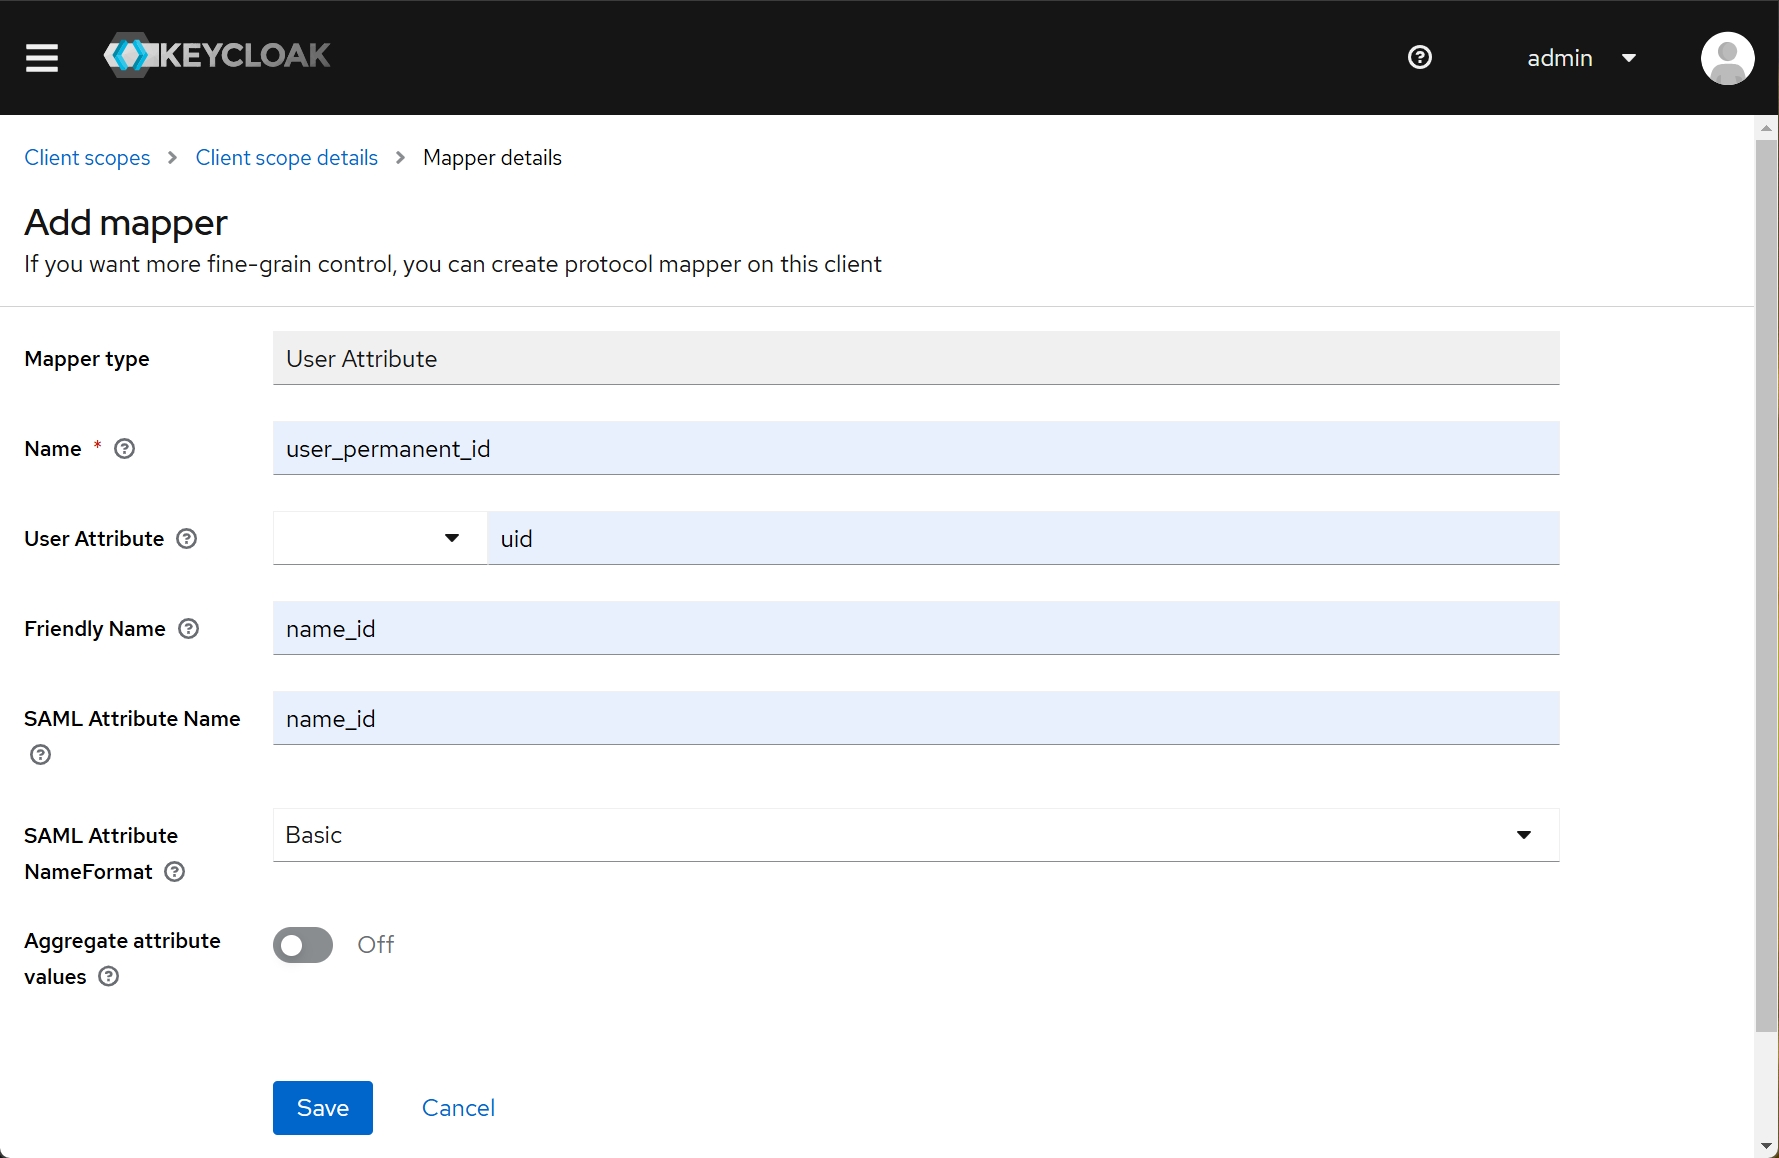
进入 Client scopes -> role_list -> Mappers -> Add mapper -> By configuration ,创建如下 User Attribute 映射:
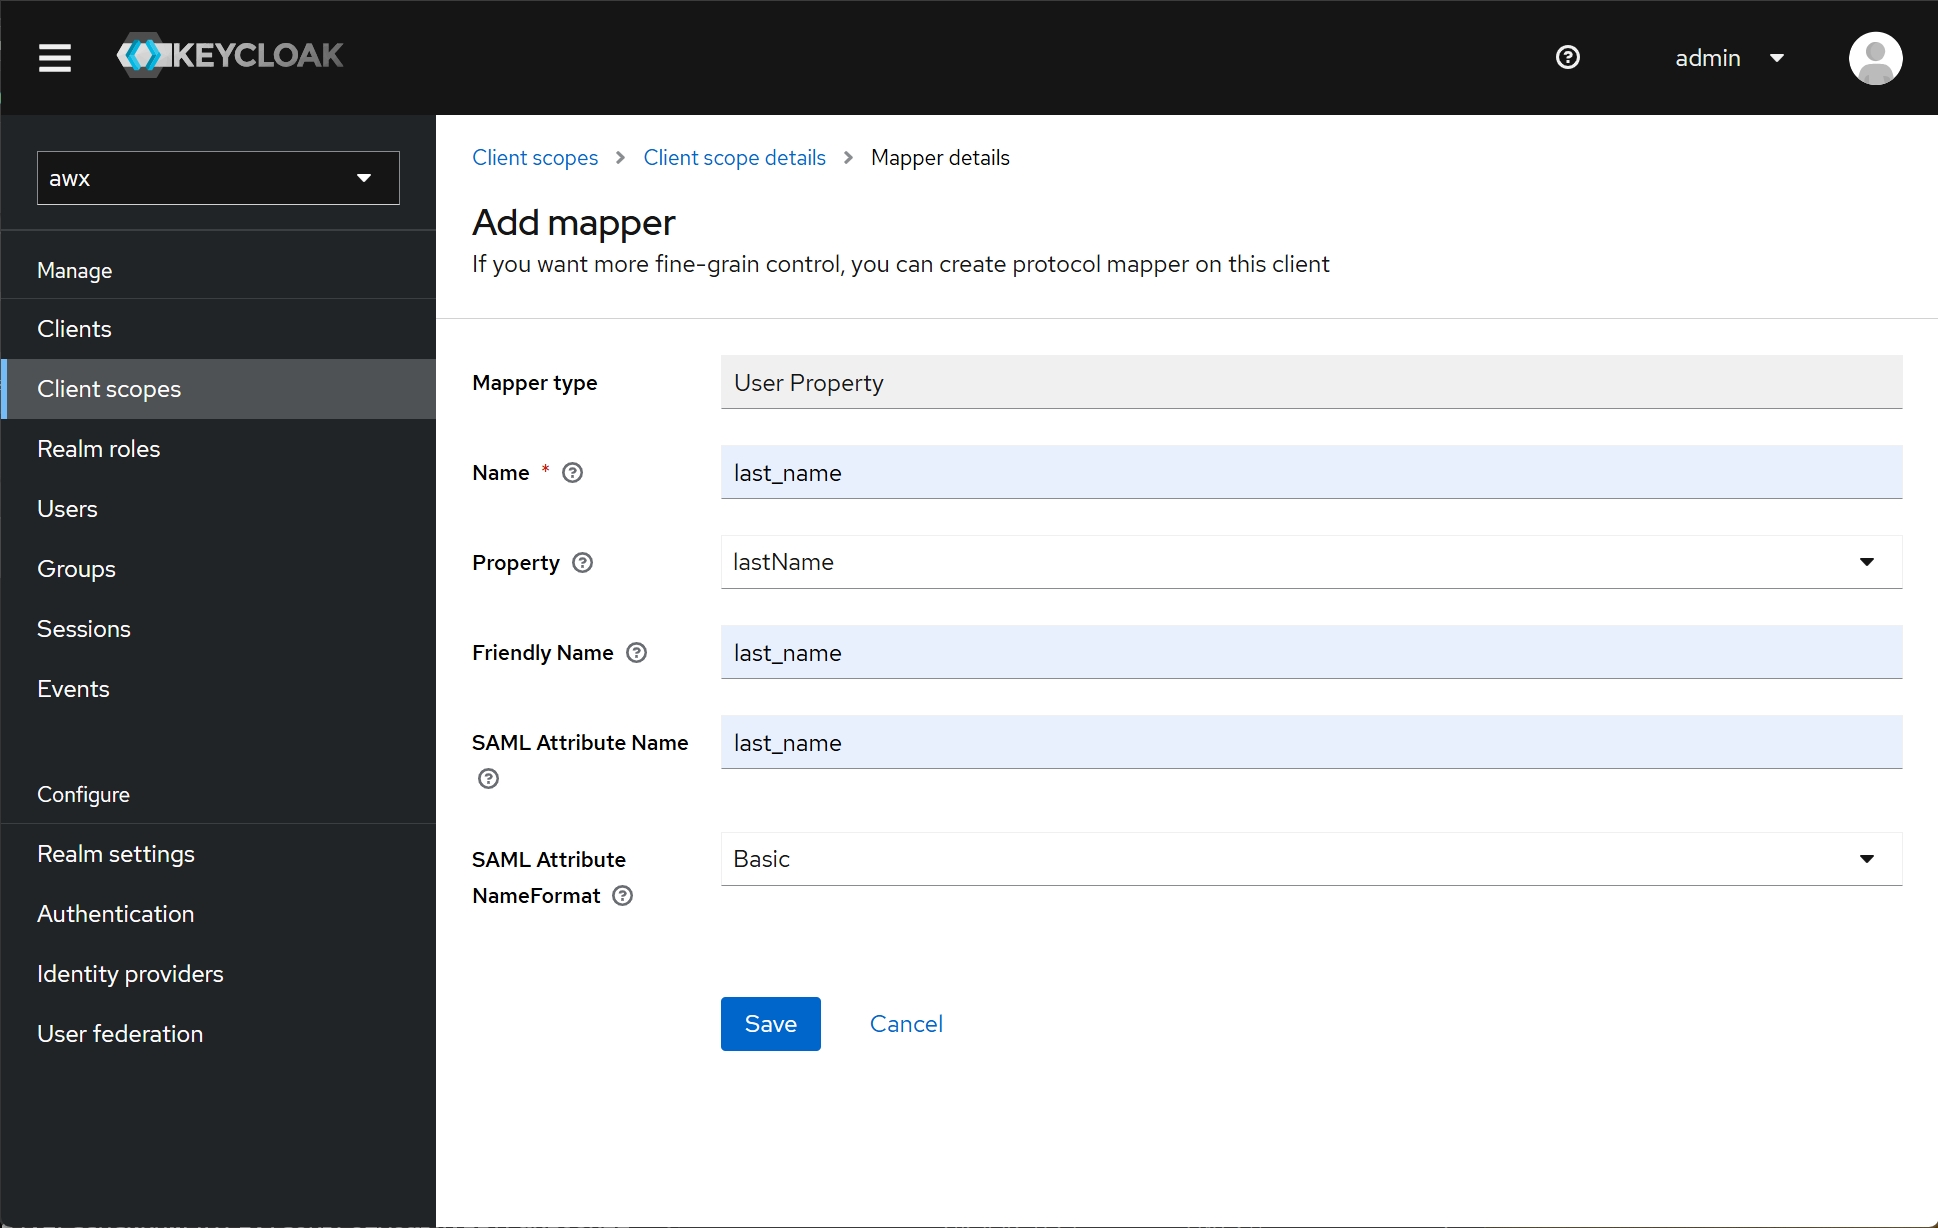
创建如下 User Property 映射:


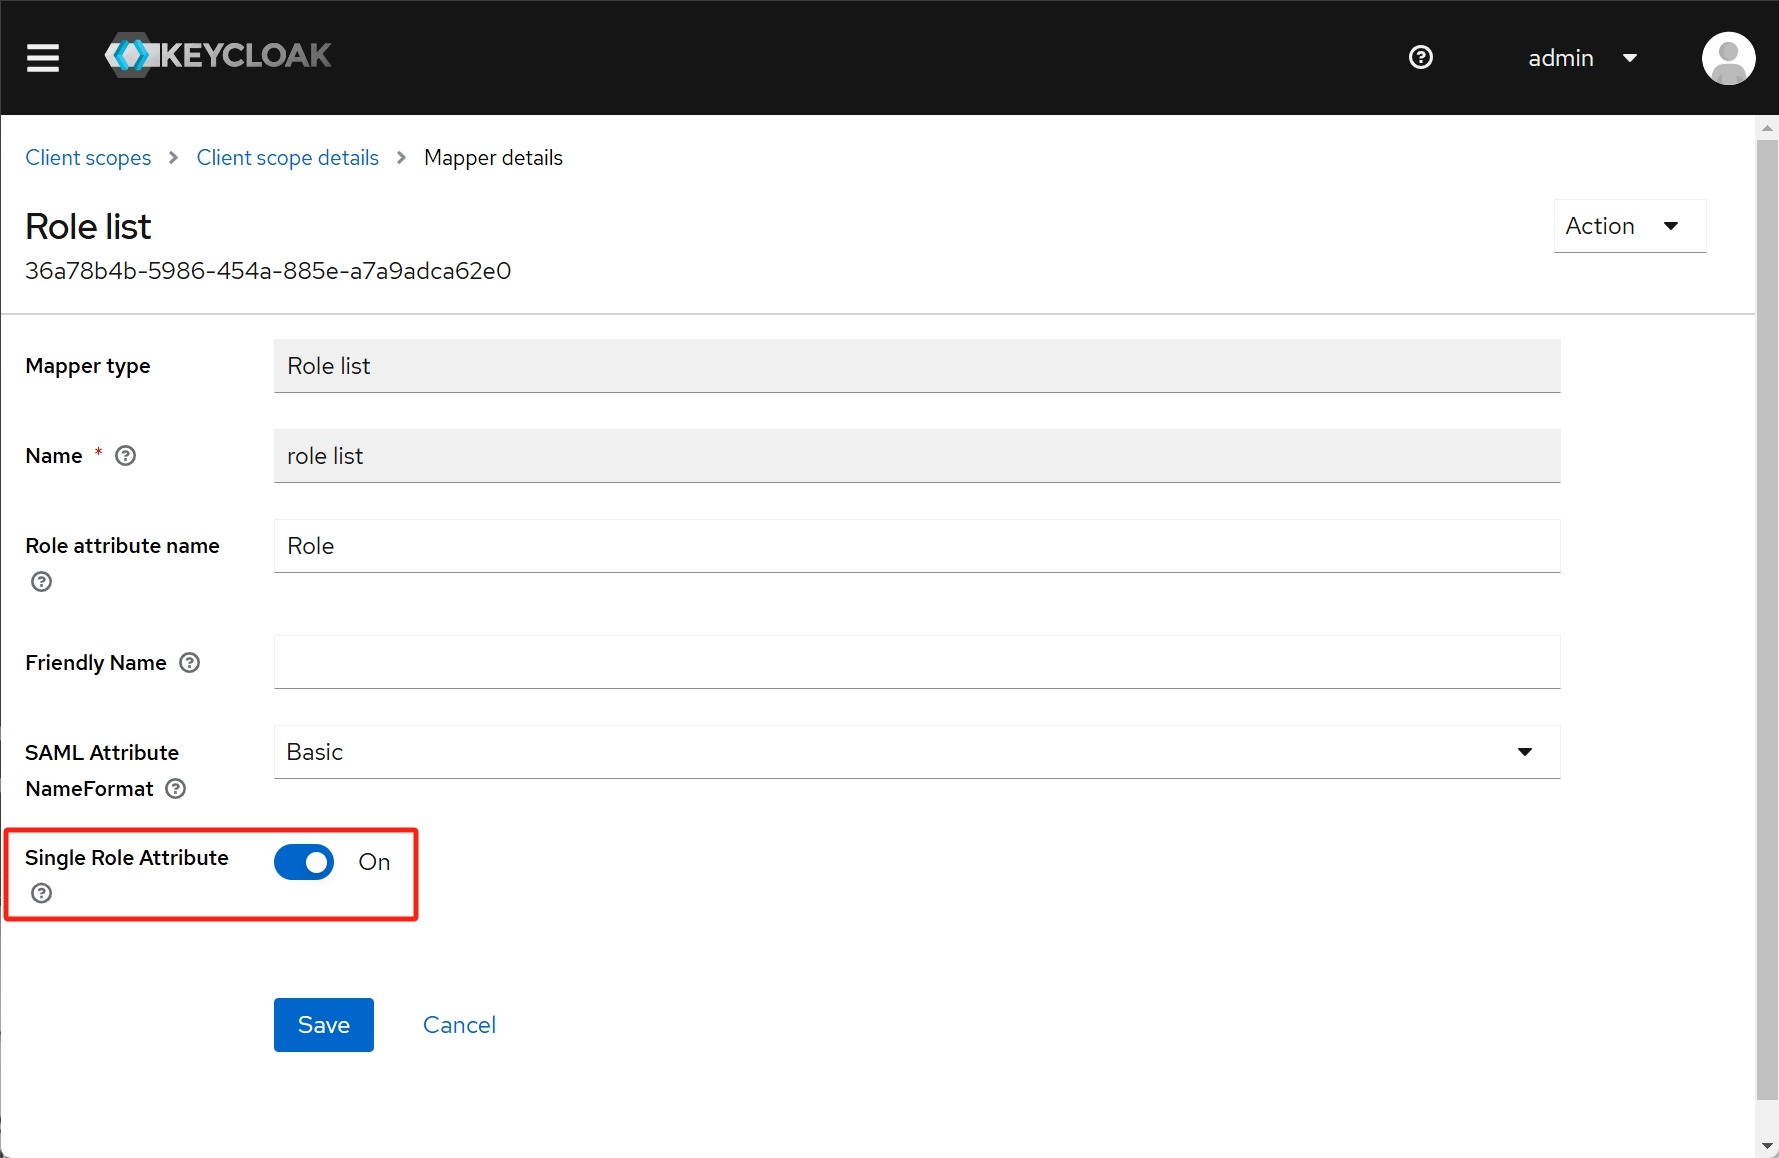
进入 Client scopes -> role_list -> Mappers -> role list ,开启 Single Role Attribute 选项:
7. 登录验证
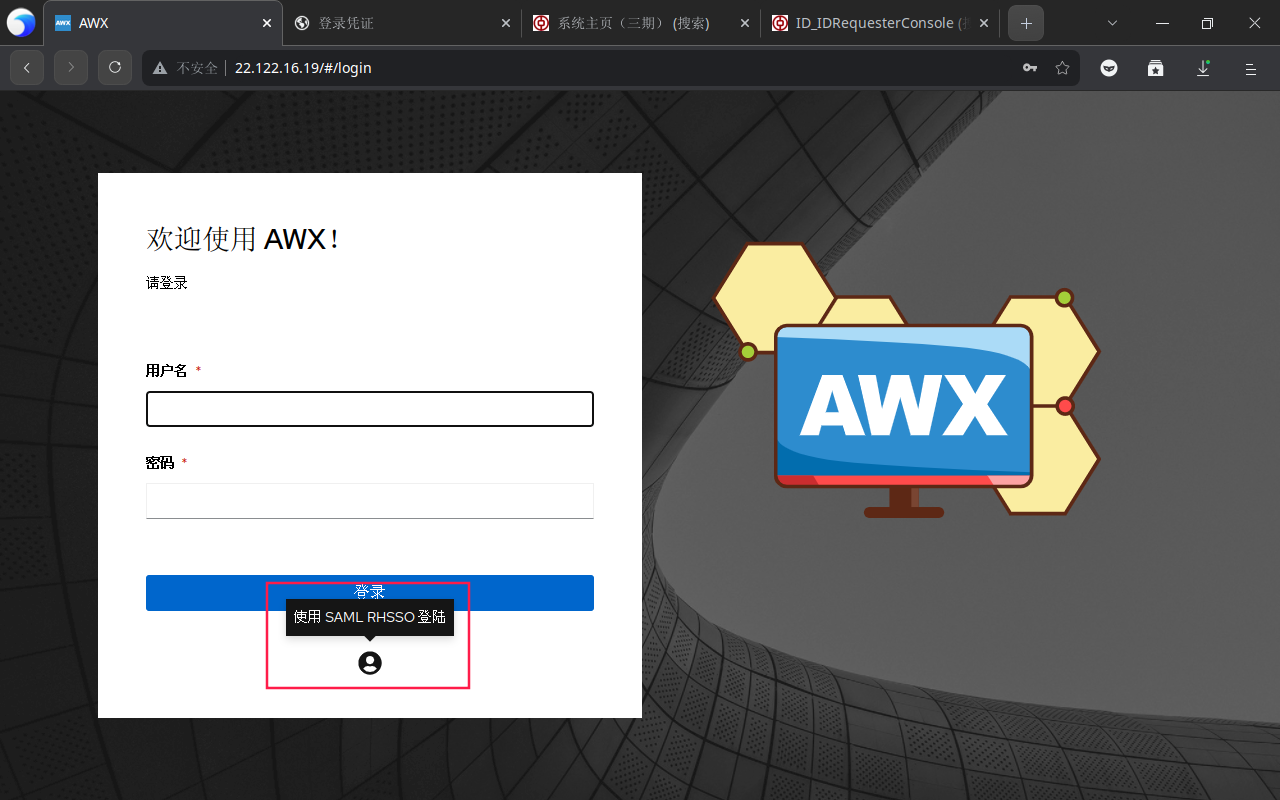
完成以后,去 AWX 点击这里登录:
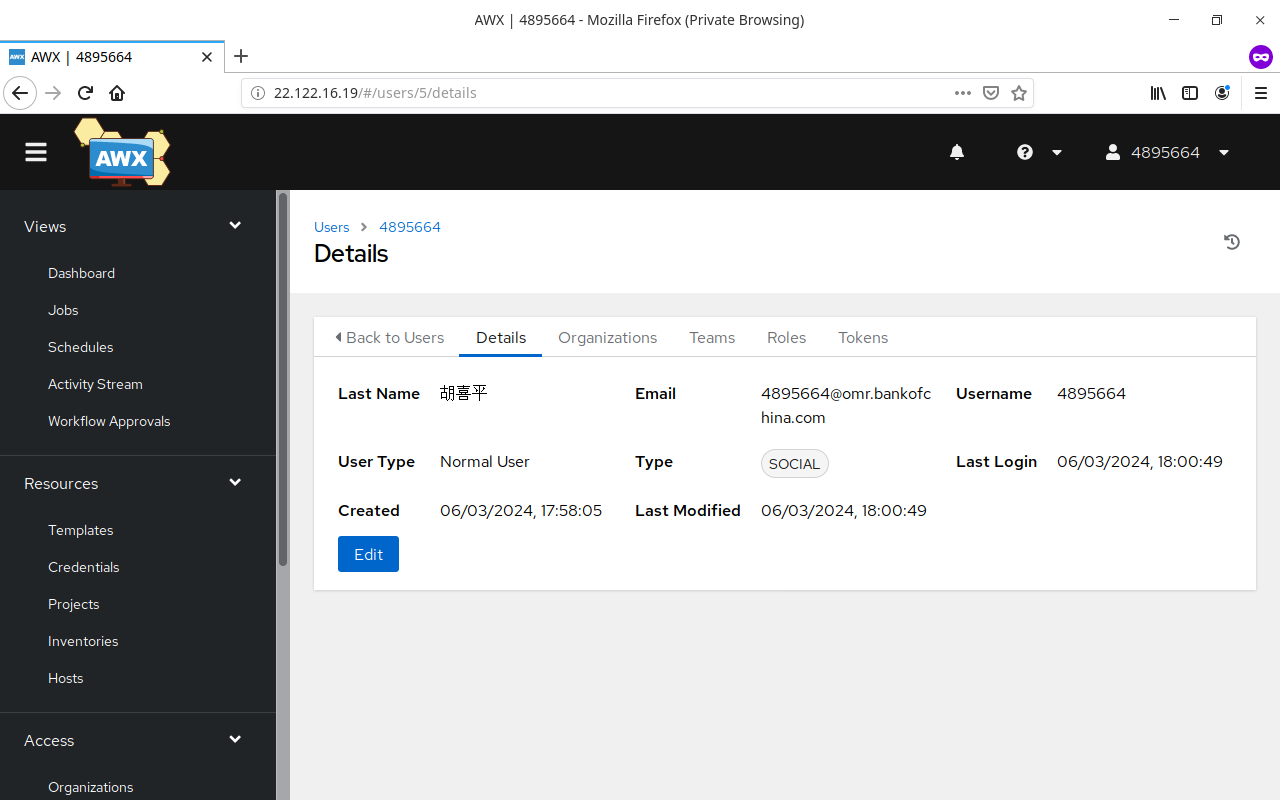
测试用户名、电子邮箱、姓名能否正常获取:
8. 其它设置
可以在 设置 -> 其它身份验证 里设置 登录重定向覆写 URL 为 /sso/login/saml/?idp=Keycloak 来让 Keycloak SAML 为默认登陆选项。
9. 参考文献
https://dev.to/rpelisse/automate-your-sso-with-ansible-and-keycloak-o1k
https://github.com/ansible/awx/issues/5570
https://github.com/ansible/awx/issues/1016
https://github.com/ansible/awx/issues/4814
https://github.com/ansible/awx/issues/13226
https://www.ansible.com/blog/red-hat-single-sign-on-integration-with-ansible-tower
https://dev.to/iderr/connect-your-awxansible-tower-with-keycloak-using-oidc--4ekb
https://josh-tracy.github.io/Ansible_Tower_RedHatSSO/
https://github.com/getsentry/self-hosted/issues/1571
https://rdeplatform.netlify.app/docs/single%20sign-on%20with%20keycloak/ integration%20with%20awx/
https://number1.co.za/using-keycloak-as-the-identity-provider-for-awx/
https://docs.ansible.com/ansible-tower/latest/html/administration/social_auth.html